
Enlarging a Bronze Sculpture: From 130 mm Original to 220 mm and 600 mm High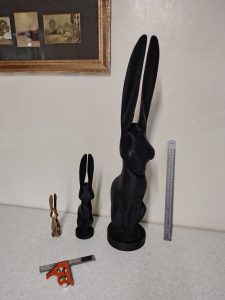
Enlarging a finely modelled bronze is never simply a matter of making something bigger. It requires absolute respect for the original artist’s vision, unwavering accuracy in proportion, and deep technical knowledge to ensure the finished piece feels entirely natural at every new size. For decades, this work relied entirely on hand‑measuring, pointing machines, and manual scaling — methods that demand immense skill but carry unavoidable risks of distortion, inconsistency, or lost subtlety. Today, the combination of high‑resolution digital scanning, precise 3D scaling, and 3D printing has transformed what is possible, making enlargement more accurate, flexible, and reliable than ever before — all while remaining fully compatible with traditional lost‑wax bronze casting.
The Original: A 130 mm High Bronze
This project began with a beautiful original standing bronze sculpture, just 130 millimetres high. Compact, detailed, and finely balanced, it carried all the character and intent of the artist’s work, but was small enough to be an intimate studio piece or cabinet display.
The client wished to see the work realised at larger, more commanding scales — first 220 millimetres high, then 600 millimetres high — while preserving every line, proportion, and delicate quality of the original. They also wanted the flexibility to produce the piece in either hand: if the original held its form in the right hand, an exact mirrored version could be created to hold it in the left, for balanced display as a pair.
Why Traditional Enlargement Has Limits
Scaling the same piece twice — to two different target sizes — by hand would have been particularly difficult. Every measurement, every transferred point, and every new curve introduces small variations. Over the whole form, these differences accumulate: subtle proportions shift, fine details soften, and the quiet balance that gives the piece its character can be lost entirely. Producing both sizes consistently would have meant repeating the whole process twice, with no guarantee the two larger versions would match each other perfectly.
Mirroring a handed object by hand is even harder. It effectively requires remodelling the piece from scratch in reverse, introducing fresh inconsistencies and never quite matching the original’s flow or weight.
How Digital Scanning Captures the Original Perfectly
The process began with non‑contact 3D scanning, which created an exact three‑dimensional digital record of the 130 mm original. Unlike photographs or manual sketches, scanning captured every surface quality: the gentle flow of the body, the sharp definition of features, the way the hand grips the object, and even faint traces of the artist’s original modelling.
This method was entirely safe — no contact, no moulds taken from the valuable bronze itself, and no risk of damage. The result was a permanent digital master that could be scaled, adjusted, or mirrored without ever altering the original work.
Precision Scaling: 130 mm → 220 mm → 600 mm
From that single scan, two exact enlargements were created mathematically:
- First scaled to 220 millimetres high — an intimate but more substantial size
- Then scaled further to 600 millimetres high — a true standing statement piece
Every dimension — height, width, depth, and the relationship between every feature — increased evenly and consistently. There was no drift, no distortion, and no guesswork. Both enlarged versions remained perfectly true to the original; and because they came from the same master, they matched each other exactly in proportion and character.
Alongside visual scaling, we subtly adjusted internal wall thickness and structural balance to suit each size. For the 600 mm version especially, this ensured the piece would cast reliably and stand securely — all while leaving the external appearance exactly as the artist intended. This is something no hand‑scaling method can achieve.
Mirroring Handed Sculpture
Because the work is created digitally, a handed object can be mirrored easily into the opposite hand. If the original held its attribute in the right hand, we could produce a perfect left‑handed version — or vice versa — with zero loss of accuracy or change to the form. This is ideal where matching pairs are needed, for balanced display either side of an entrance, staircase, or architectural feature. The reverse version feels as natural and considered as the original; it is not a copy, but a true counterpart.
3D Printing: Creating Master Patterns for Each Size
With both scaled models approved, master patterns were 3D printed. For editions requiring silicone moulds, PLA filament was used — offering excellent dimensional stability, fine surface definition, and consistent repeatability. For patterns going directly into ceramic shell for lost‑wax burnout, Polycast was used instead: it burns out completely and cleanly, leaving almost no residue and no risk of cracking the delicate shell mould.
Printing resolution was matched to the detail level at each size, ensuring fine lines and soft transitions were carried through faithfully.
Silicone Moulds and Consistent Editions
Where multiple bronzes are needed at either size, the 3D printed master is used to create a traditional flexible silicone rubber mould. Silicone captures even the most subtle surface detail, releases cleanly, and retains its shape over many castings — guaranteeing every wax copy, and every finished bronze, matches the master perfectly.
Lost‑Wax Casting and Hand Finishing
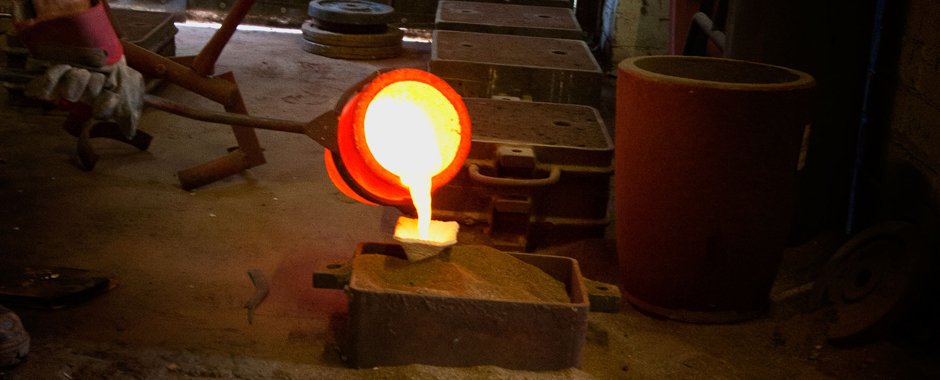
The digital and printed stages are only the foundation. Patterns became durable ceramic‑shell moulds, packed with high‑grade bronze alloy, and cast under closely controlled conditions. After cooling, shells were removed, sprues cut back, and every piece hand‑chased and refined. Finally, patina was applied — developing rich, lasting colour that brings warmth and depth to the bronze. This final hand work ensures the finished piece retains the feeling of crafted art, rather than purely digital output.
Project Experience: Smooth Progress and Reliable Results
In this kind of work we regularly face unexpected challenges — tricky surface reflections, printing defects, or material behaviours that only appear at larger sizes. Overcoming these is part of the expertise built over years of foundry practice. On this occasion, however, every step aligned perfectly: the scan was clean, both scales were precise, mirroring worked exactly as intended, and moulding and casting proceeded without issue. It is always a relief when careful preparation delivers exactly what was hoped for.
Q&A: Digital Scanning & 3D Printing – Common Problems & How to Avoid Them
- Why do shiny or reflective surfaces cause scanning problems?
A: Light bounces off glossy, polished or metallic surfaces instead of reflecting back to the scanner, creating gaps, false shapes or missing detail. Fix this by using a temporary fine matte spray, or switch to a blue‑light or structured‑light scanner better suited to difficult finishes.
- Why do I get holes or gaps in my scanned 3D model?
A: Areas hidden from view, too dark, too bright, or scanned from too great a distance will not register. Prevent this by scanning from overlapping angles, using even soft lighting, and checking coverage as you work.
- Can scanning damage delicate or heritage bronzes?
A: Correctly done, non‑contact scanning carries zero risk. Always use heritage‑approved equipment and avoid coatings or physical contact unless fully tested and agreed.
- What causes distortion when enlarging a scanned model?
A: Mixing measurement units, scaling unevenly along different axes, or not aligning the scan properly before resizing. Always use uniform proportional scaling and double‑check target dimensions.
- Why does the scanned shape look “blocky” or lose fine detail?
A: Scanning resolution was set too low for the size of the object. Use higher resolution settings for small or finely detailed work like the original 130 mm bronze.
- What is a “non‑watertight” mesh, and why does it matter?
A: It means the digital surface has invisible gaps or overlapping faces, which can cause printing failures or mould defects. Always run an auto‑repair check before sending files to print.
- Why do 3D prints warp or curl at the edges?
A: Uneven cooling, poor adhesion to the build plate, or large thin sections. Use a heated bed where appropriate, add brims or rafts, and enclose the printer for consistent temperature.
- Why do fine details disappear when printed?
A: The detail is smaller than the printer nozzle diameter, or resolution is too low. Adjust minimum feature size in your design, or use a smaller nozzle and higher resolution print settings.
- When should I use PLA, and when to use Polycast?
A: Use PLA for stable master patterns used to make silicone moulds. For patterns placed directly into ceramic shell for lost‑wax burnout, use Polycast — it burns out cleanly with almost no residue and no risk of cracking the mould.
- Why does PLA cause problems for direct burnout casting?
A: PLA expands significantly when heated and leaves more solid residue, which can crack thin ceramic shells or spoil the bronze surface. It is designed for pattern‑making, not direct casting burnout.
- Why do thin or delicate print features break easily?
A: They lack structural strength during printing or handling. Reinforce weak points digitally before printing, add temporary support webs, or increase wall thickness where it will not affect the final look.
- Why does the printed size differ from the digital model?
A: Calibration errors, incorrect scaling units, or material shrinkage. Verify printer calibration, check dimensions at every stage, and allow for known material shrinkage rates.
- Can mirroring a handed sculpture introduce errors?
A: Digitally, mirroring is mathematically perfect — but always check critical features such as hand grip, undercuts or proportions after flipping, especially if the original was slightly asymmetrical.
- Why does the print show visible layer lines?
A: This is natural to FDM printing, but becomes distracting for fine art. Reduce layer height, use higher resolution resin printing, or lightly smooth the master pattern before making a mould.
- Why do moulds pick up rough texture or defects from the print?
A: Unremoved support marks, rough layer texture, dust or residual oil on the print surface. Clean and lightly finish the master pattern before moulding to ensure the finest transfer.
- What happens if the scan has alignment errors?
A: Different scan segments do not join correctly, creating double edges or lumpy forms. Use fixed reference markers on or around the object, and re‑align or re‑scan problem areas.
- Why do larger prints like the 600 mm version need extra checks?
A: Small defects multiply at larger sizes, and weight distribution changes. Adjust internal thickness, add hidden strengthening ribs, and check casting feasibility before printing.
- Why is the final bronze slightly different to the digital model?
A: Minor changes can come from print finish, mould making, metal shrinkage during casting, or hand finishing. Account for metal shrinkage in the digital model, and use hand work to restore exact character.
- What is the most common hidden mistake in this process?
A: Treating it as fully automatic. Scanning, scaling and printing are tools — they still need foundry knowledge, artistic judgement, and careful checking at every stage.
- Why did this particular project run without issues?
A: Because potential problems were anticipated and avoided: resolution matched the scale, materials were chosen correctly for each stage, and every step was checked before moving forward. Even so, unexpected issues are common — experience means being ready to fix them if they arise.
Summary
Enlarging one original bronze from 130 mm to 220 mm and then to 600 mm, and mirroring it into the opposite hand, shows how digital methods and traditional craft now work as one. They remove the risk and inconsistency of hand‑scaling, open up flexible sizing and orientation, and keep the artist’s original vision fully intact at every scale. Used well, these tools do not replace skill — they help bring fine work to its full potential.