TL;DR A sand mould is a shaped cavity in compacted sand used to form metal parts. This article summarises the mould’s main components, the steps to prepare and pack a mould, common defects to watch for and practical fixes. For detailed sand choices, see: Casting Sand For Metal , /casting-sand-for-metal/.
A sand mould is the temporary shape that metal fills during casting. It combines a pattern, a chosen sand mix and careful packing so the molten metal copies the pattern accurately. Below you will find the practical steps to prepare and assemble a mould, reasons defects appear and simple adjustments that often improve results. See: Sand Casting for a broader overview of the process.
How a sand mould is structured
A typical sand mould has several linked parts: the cope (top half), the drag (bottom half), cores (internal profiles) and gates or risers to control metal flow. The pattern sits between cope and drag to define the cavity. Cores are used when the cast requires internal hollows or undercuts.
Understanding the parts helps you decide where to place vents, how to run gates and whether a single-piece pattern will be sufficient. That planning reduces rework once the casting is poured and cooled, because common problems often come from poor venting or inadequate support around thin sections.
Preparing the sand and the pattern
Choose sand with the right grain, clay or binder content and moisture for the alloy you will pour. Resin-bonded or chemically-bonded sands suit complex shapes and higher-temperature metals, while traditional green sand is common for iron and many bronze jobs. For more on sand properties, see: Casting Sand For Metal , /casting-sand-for-metal/.
Before ramming, inspect the pattern for loose bits, sharp edges and sprues. A clean, stable pattern reduces the chance of shifting during assembly. Lightly dust the pattern with release agent if sticking is a problem; avoid heavy coatings that obscure small details.
Building and packing the mould
Place the drag on a flat board and set the pattern in position. Add sand in layers and ram each layer evenly so density is consistent. Use a combination of hand ramming and mechanical compaction depending on the part size. The cope is prepared in the same way once the drag is compacted and the pattern properly registered.
Create cores and fit them accurately into the mould; secure any loose joints. Cut gates and vents to provide a clear flow path for metal and a route for gases to escape. Well-placed vents reduce gas defects, and a correctly sized gate helps avoid turbulence that can cause cold shuts or inclusions.
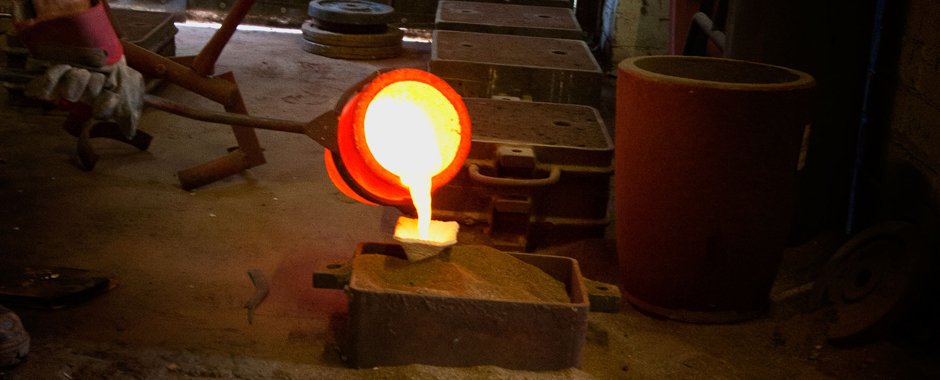
Pouring, cooling and finishing
During pouring, maintain a steady pour rate suited to the alloy and pouring temperature. After the metal has solidified, allow sufficient cooling time before breaking the mould. Rapid removal increases the risk of distortion or cracks in delicate features.
Once the casting is freed from sand, remove sprues and gates, then clean and inspect the surface. Common finishing steps include fettling, grinding small imperfections, and controlled patination if required. Plan for any machining or chasing as part of the finishing sequence.
Common defects and how to reduce them
Several predictable issues arise with sand moulds. Shrinkage occurs where sections solidify with insufficient feed metal; risers and proper feed paths help manage this. Gas porosity usually stems from trapped moisture or organic material in the sand; drying the sand and improving venting reduces the risk.
Turbulence during filling can cause inclusions and cold shuts. Smoother gate profiles, slower pours and better gating design reduce turbulence. Distortion often comes from uneven cooling; ensure symmetric wall thickness where possible and allow uniform cooling time.
What to check before repeating a cast
If a casting shows defects, work backwards through the mould preparation checklist: sand specification, compaction consistency, pattern stability, venting and gate design, then pouring technique. Small controlled changes and single-variable testing make it easier to identify which adjustment produced an improvement.
For material-specific sand choices and technical values, consult specialist guidance such as Casting Sand For Metal , /casting-sand-for-metal/ or the broader Sand Casting resources. See: Sand Casting for context and process-level details.
FAQ
A core is a shaped insert, usually made from bonded sand, that creates internal cavities or undercuts in a casting. Cores are positioned into the mould before pouring and secured to resist displacement.
Select sand based on grain size, permeability, clay or binder content and thermal stability for the alloy. Green sand suits many general purposes; resin-bonded sands help with fine detail and high temperatures.
Drying or cure time depends on binder and sand type; green sand needs less curing while chemically bonded sands require full cure. Follow the supplier guidance for the specific mix used.
Common defects include shrinkage, gas porosity and cold shuts. Address them by improving risering, venting, sand preparation and gating to reduce turbulence and trapped gases.
Learn about Bronze statue maintenance
If you need specialist assistance for complex or high-value work, a foundry with experience in bronze and aluminium can advise on sand mixes, gating design and finishing options. For institutional conservation or fine-art commissions, look for workshops that can document the process and handle delicate patterns.