
TL;DR The lost-wax bronze method converts a pattern into a finished metal object by making a wax model, building a mould, removing the wax, casting molten bronze into the cavity and then finishing the surface. This guide outlines practical steps, common checks and realistic points where you should allow time or consult a foundry.
Working with lost-wax casting means managing a sequence of stages where mistakes early on can add time and cost later. Whether you are an artist commissioning a piece or a fabricator preparing a prototype, the same steps repeat: pattern and model, mouldmaking, burnout, metal pour, cleaning and surface finish. The following sections explain each stage and offer practical checks to help you plan schedule and budget.
Key points to plan for
Before the detailed workflow, keep these principles in mind. They set realistic expectations and guide simple decisions that reduce rework.
- Allow time for model approval and any structural adjustments before moulding; corrective work after casting is often costly.
- Choose wax and spruing strategies that suit the size and detail of the piece to avoid casting defects and internal stresses.
- Expect multiple finishing stages: removal of gates, chasing, welding, and patination each take skilled hands and drying or curing time.
- Discuss scale and wall thickness with the foundry early; hollow sections and thin walls require different preparation and rigging.
Step-by-step process
The lost-wax route can be summarised as a series of linked operations. Each step sets up the next, so take the time to inspect and sign off at critical points.
1. Pattern and wax model
Begin with a pattern: a sculpted original, a 3D-printed master or a carved model. From that master a wax copy is produced either by hand-modelling or by injection moulding if replicating multiples. Check the wax model for seams, thin areas and any surface marks that would become permanent in bronze. If the piece requires internal structure, discuss core or support details now.
2. Gating and investment moulding
Attach wax gates and vents that will allow bronze to flow and air to escape. The gating layout influences metal flow and final surface condition. The wax assembly is then invested: encased in a refractory material to form a mould that can withstand the high temperatures of burnout and casting.
3. Burnout and mould preparation
The invested moulds are heated to melt and evacuate the wax, leaving a cavity in the exact shape of the model. Burnout schedules vary with investment type and mould mass; foundries follow controlled ramp rates to avoid cracking the mould. After burnout the mould is preheated to the correct pouring temperature.
4. Metal melting and pouring
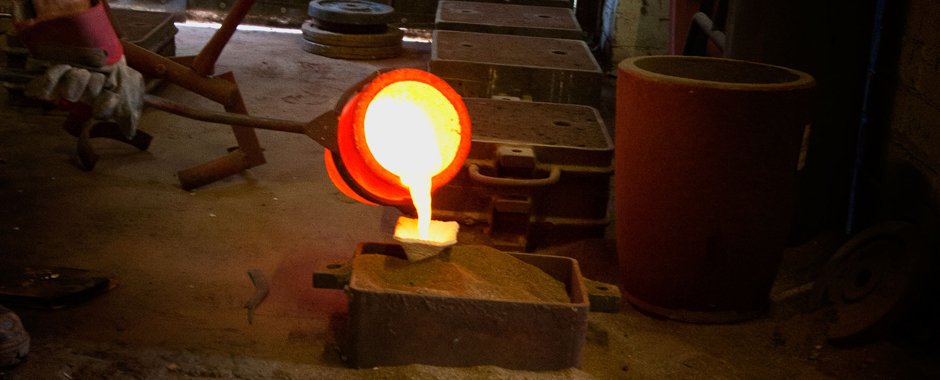
Bronze is melted and brought to a pouring temperature chosen for the alloy and casting conditions. The pour must be steady and continuous to reduce turbulence and air entrapment. After the pour the mould is left to cool sufficiently before any mechanical extraction is attempted.
5. Knockout, metal finishing and assembly
Once cooled, the investment is removed and the bronze pieces are recovered. Gates and sprues are cut away and joins are chased or welded as required. This stage often reveals areas that need reworking, such as minor porosity or misruns; these are resolved by welding and filling before final surface work.
6. Patination and final finish
The chosen patina and finish are applied after surface repairs. Patination can be chemical or heat-assisted and is often layered to achieve depth. Finally the piece is sealed with an appropriate protective coat to meet the intended display or environmental conditions.
Each stage above benefits from clear sign-off. For example, approving the wax model and gating plan reduces surprises at casting and finish stages.
Referencing material guidance early helps align tolerance expectations and avoids late changes during investment or casting.
FAQ
Timelines vary with scale, complexity and how busy the foundry is, but even small, straightforward pieces usually run to several weeks once you allow for mouldmaking, burnout, casting and finishing. Larger or more complex sculptures can take a few months end to end, so it is sensible to agree a schedule with key approval points for the wax, gating layout and patina before work starts.
Yes. Many foundries work from 3D-printed masters or directly printed wax patterns, which can be very efficient for complex geometry or repeatable parts. When you plan to print the pattern, discuss file format, resolution, scaling, surface preparation and any fragile features with the foundry so the print suits their mould system, tolerances and finishing workflow.
Porosity usually comes from trapped gas, shrinkage during solidification, or turbulence and poor feeding in the mould. In lost-wax work this can be linked to issues such as inadequate burnout, suboptimal gating and venting, incorrect pouring temperature, or sections that are too thick or too thin for the chosen alloy and rigging, which is why gating design and controlled process parameters are so important.
Wall thickness for hollow bronze is a balance between structural strength, weight, cost and castability. Typically the foundry will propose a practical range based on alloy, size and use, then refine it with you at the wax or design stage, adding ribs, cores or local thickening where needed so the piece fills reliably, supports its own weight and still matches the sculptural intent.
Involve the foundry as early as possible, ideally once you have a clear concept, scale and intended use but before fine details, wall thicknesses and complex undercuts are fixed. Early conversations about mould parting, gating, cores and support will reduce casting risk, help set realistic tolerances and lead times, and avoid costly changes after the wax has been made or metal has been poured.
Summary and what to do next
Lost-wax bronze casting is a chain of interdependent steps from patterning through to finish. The most efficient projects prioritise a reviewed wax model and a clear gating plan, agree materials and tolerances early, and allow skilled finishing time. If you are preparing a brief for a commission or prototype, gather scale drawings, expected finish and intended use so the foundry can advise on wall thickness, gating and expected lead times.