
TL;DR Lost-wax casting transforms a wax pattern into a bronze object by investing, burnout and pouring. Prepare a stable pattern, plan gating and vents, and choose suitable investment and alloy; careful preparation reduces defects. Read the concise step sequence below and consult specialist material guidance for wax selection and scaling before commissioning or attempting complex work.
The lost-wax, or cire perdue, method produces detailed bronze work by replacing a wax model with metal. For makers and technicians this process is as much about careful preparation as it is about the pour. The following sections summarise the essentials, describe the workflow step by step, and point to further material guidance to help with wax choice and scaling.
Key points to keep in mind
Lost-wax casting depends on a controlled sequence: pattern, investment, burnout, metal pour and finish. If any stage is rushed, the risk of porosity, misruns or surface faults increases. Plan the work to match the scale and complexity of the piece: gating, vents and sprue layout are design elements, not afterthoughts.
Work with compatible materials. The wax type, investment mix and bronze alloy should be chosen so that expansion, thermal behaviour and burnout residues are compatible. For larger or hollow pieces expect additional stages such as cores, chaplets or ceramic shells.
Materials and preparation
Gather materials and tools before you start: modelling wax, sprue wax, wax tools, a clean moulding brush, investment powder and gauging liquids, refractory wash, kiln, burnout furnace, crucible and appropriate bronze alloy. Also prepare safety kit: gloves, eye protection and respirator suitable for dust and fumes.
- Wax pattern: select a wax that holds detail and that you can join and repair cleanly.
- Investment: use a grade and mix suited to the size and detail of the work; adjust water content and additives for working time and expansion control.
- Mould box and support: ensure the mould box is rigid and offers even support during setting and handling.
- Gating and vents: plan sprues and vents to promote directional solidification and to avoid air traps.
Before investing, check the model thoroughly for hairline defects, loose particles or fingerprints. Surface contamination and trapped air are common causes of surface blemishes. A light coating of release or refractory wash may be advisable for multi-part moulds or where fine detail is being protected.
Step-by-step process
Below is a condensed sequence suitable for small to medium solid castings. Hollow or large sculpture workflows add extra stages such as core-making and shell-building.
1. Model and finish the wax pattern
Create the wax model at final size, including any texture or surface finish. Use sprue wax to attach primary sprues; make sprue cones generous enough to feed the melt. Smooth joins and remove seams that would trap investment or air.
2. Attach gating and vents
Position sprues so molten metal flows naturally into the heaviest sections first. Add vents at high points to allow gases to escape during pouring. The gating system should promote laminar flow where possible.
3. Invest the tree
Place the wax assembly in a rigid flask and pour the investment slurry. Tap gently to release trapped air. Allow the investment to set fully according to manufacturer times and local conditions; premature heating can cause steam blemishes.
4. Dewax and burnout
Remove wax by steam or low-heat escape, then perform a controlled burnout cycle in a kiln or furnace. The schedule must clear residual carbon and drive off water while minimising thermal shock to the investment. A proper cycle reduces gas defects.
5. Preheat and pour
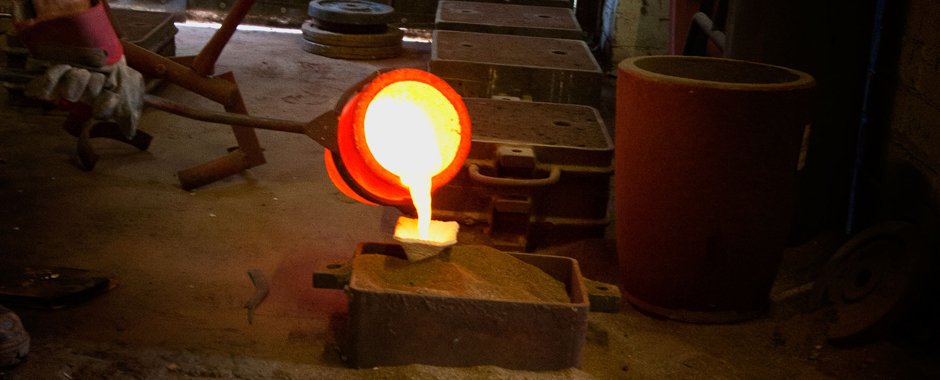
Preheat the mould to the recommended temperature to avoid cold shuts. Melt the bronze in a suitable crucible, degas and skim as needed, then pour steadily. Safety and competent handling of molten metal are critical; maintain a clear exclusion zone and PPE for all personnel.
6. Knockout and metal finishing
After cooling, remove the investment and cut off sprues. Grind and chase seams, then perform any welding for assembly. Final patination and conservation steps depend on the desired surface and environment for display.
Related guide and next steps
Choosing the right wax and investment is a frequent make-or-break factor for successful lost-wax work. See: Choosing Wax For Bronze: Types, Suppliers And Uses for detailed material guidance on wax types and suppliers. That pillar resource covers practical trade-offs that affect pattern durability, repairability and casting finish.
If you need more on materials selection for shop-scale work, consult: Wax For Bronze Casting: Types And How To Choose. Together these resources help with supplier choices, wax blends and scaling advice before you commit to expensive pours or complex hollow-casting work.
FAQ
Waxes designed for sculpting and high fidelity capture finer edges; balance this with how easily the wax can be repaired and joined for spruing.
Porosity is usually gas or shrinkage related. Control burnout, design directional gating and risers, and degas the molten metal to reduce defects.
Steam dewax works for many trees but very large or dense assemblies often need a kiln burnout schedule to clear internal wax safely.
Fine-detail investments use finer grain and controlled expansion mixes; select an investment compatible with your alloy and expected firing temperatures.
Follow the investment manufacturer’s burnout schedule. A gradual temperature ramp avoids steam expansion and cracking of the mould.
Consult early for hollow-casting, large-scale work or conservation finishes; early input on gating and materials saves time and cost.
Summary: careful wax selection, considered gating and a controlled burnout cycle are the most reliable ways to reduce defects in lost-wax castings. For material selection and supplier details, consult the material guides linked above before committing to a large or complex pour.