TL;DR The lost-wax approach to bronze combines a detailed wax model with moulding and metal pouring to reproduce fine surface detail and complex forms. This article summarises the main stages, highlights preparation for wax and digital workflows, and answers the most common practical questions for artists and fabricators. See the FAQ for clarity on timescales, sizes and finishing options.
The lost-wax route to bronze casting is a practical method for producing detailed sculptures and small to mid-sized components. It pairs a precise pattern,traditionally carved in wax or produced by 3D printing,with investment moulding and metal pour to capture fine detail and subtle textures. The rest of this article walks through the essential ideas you should know, the typical sequence of stages, and how to prepare models so a foundry can deliver the finish you expect.
Quick overview of what matters
At its heart the method relies on three things: an accurate pattern, a stable mould, and a controlled pour. The pattern determines the surface detail and the need for any seams or joins to be hidden or chased afterwards. The mould,often a ceramic investment,must withstand the metal temperature while retaining the cavity shape. Finally, gating and risering are designed to ensure metal flows to every void without trapping air.
These three considerations shape decisions about size, wall thickness, and finishing. Early choices reduce costly rework later, so invest time in model preparation and a clear brief for the foundry.
Key points to know before you start
Decisions about scale and material influence each subsequent stage. Small, highly detailed pieces usually use sacrificial ceramic investment. Larger forms may be cast in sections and joined. Common bronze alloys vary by colour and hardness; your chosen alloy affects pouring temperature and finishing technique.
- Surface detail: very fine textures are faithfully captured but may need protective coatings on fragile wax models.
- Wall thickness: avoid extremely thin sections unless specifically planned; thin areas risk incomplete filling or weakness.
- Assembly: complex pieces are often cast in parts and welded together, then chased to hide joins.
Preparing a short specification describing size, desired finish, and whether you want patination, helps the foundry advise on alloy choice and finishing processes.
Typical step-by-step process
The sequence below is the usual route taken in a workshop that combines traditional practice with modern digital options. Each stage leads naturally to the next and helps avoid surprises at the pour.
1. Pattern creation
Create the pattern in wax, or produce a polymer master from which a wax copy is taken. For digital workflows, a 3D print may be used as the master and then invested or used to make a silicone mould for wax casting. The pattern should include any necessary vents and registration marks if it will be cast in pieces.
2. Spruing and investment
Attach sprues and risers to the wax model to form channels for metal flow and air escape. The assembly is then encased in a refractory investment material. Once set, the whole assembly is heated to melt out the wax, leaving a cavity that mirrors the pattern.
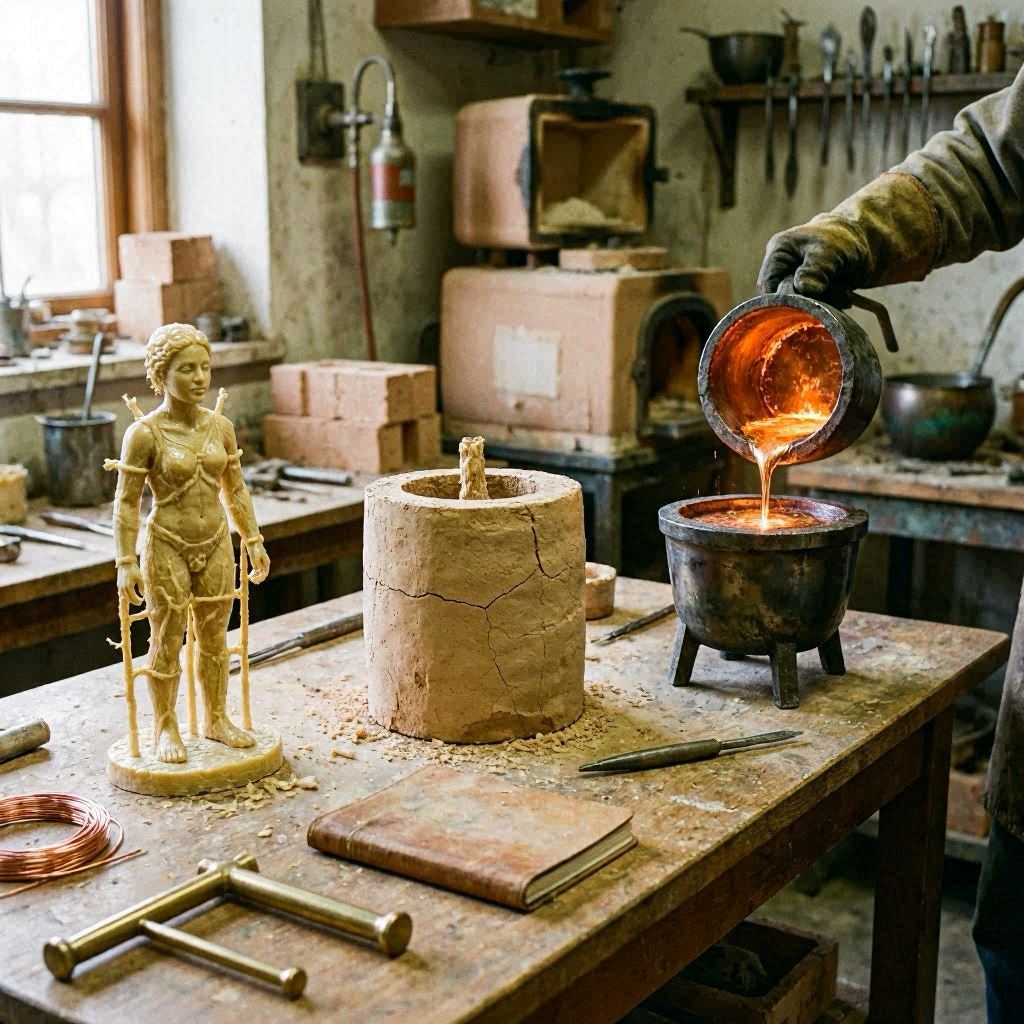
3. Casting
Molten bronze is poured into the pre-heated mould. The gating system directs flow; risers act as reservoirs to reduce shrinkage defects. After cooling, the investment is removed to reveal the raw casting, which typically requires cutting off the sprues and initial cleaning.
4. Finishing
Chasing (tooling) removes seams, blends joins and refines detail. Patination and surface finishing follow according to the brief: from polished highlights to coloured chemical patinas or wax coatings for protection. If the piece was cast in sections, welding and carefully matched finishing restore continuity.
Each completed step prepares the piece for the next; a tidy wax and careful spruing make moulding and pouring significantly more reliable.
Preparing wax models and digital workflows
Good preparation shortens lead times and reduces risk. If you are working with a foundry, supply images, dimensions and a clear brief indicating which details are essential and which can be simplified.
- Sculpting in wax: use firm, stable waxes for fine tools and softer wax for modelling textures. Avoid extremely thin overhangs unless supported.
- 3D printing: resin prints are commonly used as masters; they can be invested directly or used to make silicone moulds for wax reproduction. Discuss which print resolution and material the foundry prefers.
- Scaled proofs: for new forms, a small-scale proof cast can expose gating issues without the cost of a full-size error.
FAQ
A small commission can take a few weeks from finished pattern to delivery; larger or multi-part works commonly take longer due to tooling and finishing.
Yes. Many studios use 3D prints as masters or to make silicone moulds for wax reproduction; discuss preferred print materials and resolution with the foundry.
Size limits vary by foundry and process. Very large works are often cast in sections; discuss mounting and structural requirements early in the design stage.
Costs depend on alloy, size, complexity and finishing. Request a quote with dimensions, photos and a desired finish for an accurate estimate.
Options include polished, brushed, chemical patination in a range of colours and protective wax or lacquer coatings. Some finishes require extra time and specialist labour.