
TL;DR Hollow casting produces lighter, more economical bronze forms and is especially useful for large sculpture and detailed architectural elements. This guide summarises the main advantages, compares common methods, walks through a representative workflow and highlights practical design and finishing considerations for successful results.
Hollow casting reduces weight and material cost while keeping the aesthetic and structural benefits of bronze. For artists and fabricators deciding whether to specify a hollow bronze solution, understanding the method variants, moulding steps and the implications for design and finishing can make the difference between a reliable commission and repeated rework.
What hollow casting aims to achieve
The principal goals are to reduce the weight of a bronze piece, control material use, and retain surface detail without casting a solid mass. Hollow forms are easier to transport and install, and they often use less bronze while still achieving a robust shell. These outcomes affect how a piece is modelled, how cores are used and how the casting is finished.
Why makers choose hollow techniques
There are three common motives for choosing hollow casting: scale, economy and thermal control during casting. Large solid pours introduce far greater technical risk, require more metal and demand heavier handling. Hollow shells offer predictable cooling and shrinkage patterns that can be easier to manage when the process is planned correctly.
Core methods and material choices
Hollow bronze forms commonly use either sacrificial cores or reusable internal supports. Cores may be made from refractory materials, ceramic mixtures, or specially formulated foam that burns out cleanly in the kiln. Wax tooling, gating systems and ceramic shell or investment materials must be selected to match the alloy, surface detail and expected firing temperatures.
Core variants and when to use them
Simple hollow pieces can use a single mandrel or removable core, while complex geometry may require multi-part cores and internal vents. For fine surface detail, investment (lost-wax) routes produce excellent fidelity. For larger, less detailed architectural pieces, a sand or shell process with a refractory core can be more economical.
Step-by-step hollow-cast workflow
The following sequence outlines a representative workshop approach. Two principal branches are shown: a lost-wax derived hollow method and a shell-based hollow method. Both share common preparatory and finishing phases.
1. Design and pattern preparation
Create a scalable pattern that accounts for wall thickness, mounting points and access for cores or vents. Where sculptural detail is critical, produce an accurate wax or polymer model. Ensure internal cavities are accessible for core placement and for removal or burnout where necessary.
2. Core and mould assembly
Fit the internal core and build the outer mould around the pattern. For investment methods the wax model is invested around a core; for ceramic shell methods a pattern is dipped repeatedly to build the shell. Attention to even layering ensures consistent wall thickness and prevents thin spots.
3. Burnout and metal pour
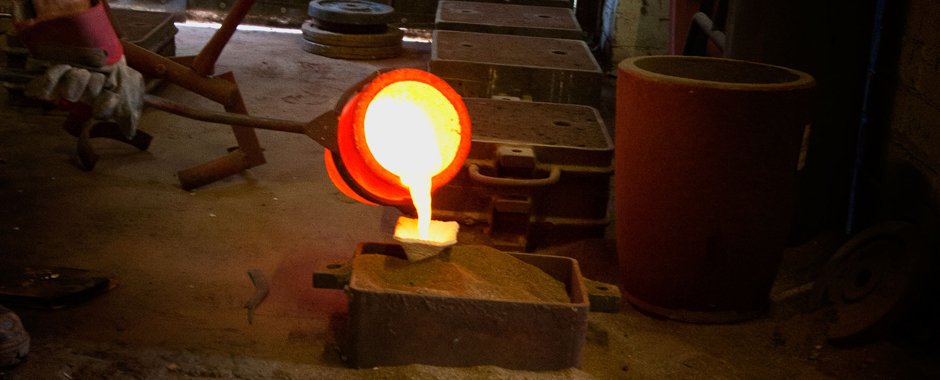
Remove the sacrificial pattern through burnout or extraction, depending on materials. For lost-wax hollow casts, the wax is driven off in a kiln while the core remains; with some core materials a controlled burnout removes only wax. Preheat the mould or shell to the recommended temperature for the chosen alloy to minimise thermal shock. Pouring is scheduled to control turbulence and help metal flow around internal structures.
4. Knockout and core removal
Once the casting has cooled, separate the outer shell and remove the core material where possible. Some cores are fracturable and can be mechanically removed; others are dissolved or ground out. This phase requires careful tooling to avoid damage to the inner surface and any thin detail.
5. Welding, chasing and finishing
Hollow pieces frequently need seam welding where sections were cast separately. Chasing refines surface detail and blends joins. Patination and protective coatings are applied after cleaning; the chosen finish should suit the piece’s intended environment and handling.
Design and structural considerations
Plan the wall thickness according to size, weight tolerances and structural loads. Typical workshop practice aims for consistent thickness to avoid uneven cooling, though local strengthening ribs or internal frames may be added for large spans. Consider how attachment points will be integrated and whether internal stiffening or bolting inserts are required.
Common faults and how to avoid them
Porosity, thin sections and incomplete fills are frequent issues with hollow casting. They often stem from poor venting, uneven shell thickness, or inadequate preheat. Minimise these risks by designing clear gates and vents, using consistent mould-building practices, and conducting test pours for unfamiliar alloys or geometries.
When to choose hollow casting versus solid casting
Choose hollow casting for large artworks, façade elements, or where transportation and installation weight are constraints. Solid casting is sometimes preferred where mass is needed for stability or acoustic properties. Assess the installation method, structural requirements and finishing expectations before selecting an approach.
Practical tips from the workshop
- Document expected wall thickness and tolerances on every pattern to avoid ambiguity between design and foundry team.
- Include inspection ports or removable panels where internal access might be needed later.
- Use mock-ups or reduced-scale test pieces to verify venting and fill before committing to full-size pours.
FAQ
Wall thickness depends on scale, support and the intended finish. Small decorative pieces often use thinner shells, while large public sculpture will require thicker sections or internal reinforcement. Always verify with the foundry to match alloy and installation needs.
Investment (lost-wax) derived hollow casting usually preserves texture very well. Shell or sand approaches can reproduce less detail unless the pattern and dipping or packing are handled with care. Where surface fidelity matters, specify an investment route and discuss master pattern finishes with the foundry.
Core removal methods depend on the core material. Some refractory cores are fractured and extracted, while foam or wax cores may be burned out or dissolved. Provide adequate access and plan for core removal early in the design stage.
Hollow casting can reduce bronze consumption and make handling easier, but the preparation, core work and finishing can add labour. Evaluate total project costs rather than metal price alone to decide which route is more economical.
Repairs and welding are standard workshop operations, though hollow pieces sometimes require internal bracing or access panels to support welding and finishing. Discuss potential repair strategies with the fabricator before casting.
Related guides
- Hollow-Cast Bronze Sculpture: Techniques And Finishes (https://www.bronzecraft.co.uk/investment-casting/hollow-cast-bronze-sculpture-techniques-and-finishes/)
Summary
Hollow casting is a flexible approach suited to large-scale sculpture and functional bronze elements where weight, economy and installation matter. Choosing the correct core, moulding method and finishing sequence is essential to control defects, maintain detail and meet structural needs. Early dialogue between designer and foundry will clarify tolerances, access, and finish, and will reduce surprises during pouring and post-cast finishing.
What to do next: discuss the intended scale, mounting and finish with your chosen foundry and request a small test piece where precision or an unfamiliar alloy is involved. That step quickly reveals practical adjustments to wall thickness, venting and core choice.