
TL;DR This article outlines the typical workshop workflow used to turn a model into a finished bronze piece, highlighting the main stages: pattern or model preparation, moulding or investment, metal pour and cleanup, and finishing and patination. It explains practical checkpoints for quality control and what to expect when commissioning or specifying a foundry service.
Bronze casting brings a design from a model into a durable metal object through a sequence of specialist operations. For design and fabrication professionals, knowing the common stages helps you plan tolerances, timelines and budgets, and communicate clearly with a foundry. The sections below describe the essential phases and the practical considerations that often affect outcome and cost.
Key points to keep in mind
Successful bronze casting depends on clear models, robust moulds and controlled metalwork. Early decisions about whether to use lost-wax (investment) or sand-based methods have major downstream effects on surface detail, section thickness and cost. Communicate desired finish, structural needs and tolerance limits before production begins to reduce rework and unexpected expense.
Quality control checkpoints typically include model inspection, mould integrity checks, test pours for complex forms and staged fettling after casting. Where a small batch or high detail is required, lost-wax routes can often offer finer surface fidelity. For broader overviews of different methods, see the bronze casting techniques resources listed in further reading.
Step-by-step workflow
The following describes a typical sequence for a lost-wax based approach, then notes variations for sand and hollow casting. Each numbered stage closes with the key outputs that set up the next stage.
1. Model and pattern preparation
Start with a physical model or a pattern made in clay, wax, 3D-printed resin or another suitable medium. Models must reflect the final shape, including intended splits if the piece is larger or complex. For high-detail work, a direct wax model is common; for large sculpture, a scaled model and sectioned patterns may be necessary.
Deliverable: a clean, dimensionally accurate model with any mounting or assembly features resolved so the workshop can proceed to mouldmaking without guesswork.
2. Moulding and investment
For lost-wax casting, the model is copied into wax (direct modelling, injection or printed wax) and then sprued and invested in a refractory material to create a ceramic shell. For sand or cope-and-drag methods, the pattern is packed in sand to form a cavity for pouring. Investment methods give greater fidelity; sand methods are quicker for large, simple shapes.
Deliverable: a sound mould or ceramic shell with clear gating and venting to allow metal flow and gas escape.
3. Burnout and casting
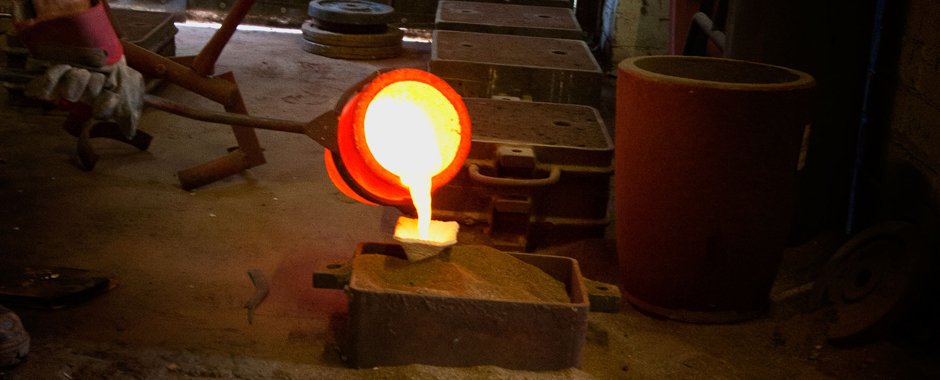
Wax is removed from investment shells by controlled heating, leaving a cavity, or sand moulds are prepared and dried. Bronze is melted to a controlled temperature and poured into the prepared mould. For large or hollow pieces, controlled pours and specialised gating reduce the risk of cold shuts and porosity. Controlled cooling follows the pour to reduce thermal stress.
Deliverable: a cooled casting ready for demoulding and primary cleaning.
4. Demoulding, fettling and metalwork
After demoulding, the casting requires removal of sprues and risers, cutting back excess metal and filing or welding where sections are joined. Skilled fettling restores design lines and prepares the surface for finishing. For structural pieces, this stage includes dimensional checks and any welding or machining needed to meet specifications.
Deliverable: a structurally sound, dimensionally acceptable raw casting ready for finishing.
5. Surface finishing and patination
Final finishes range from polished highlights to textured patinas. Mechanical finishing, chemical patination and protective coatings are chosen to match the design brief and intended location. Surface treatment also affects long-term maintenance; discuss preferred patina stability and care with the foundry early on.
Deliverable: the finished bronze with agreed surface and protective treatments applied.
Further reading and resources
For more on method choice and comparative detail, consult the wider coverage on bronze casting techniques. Designers often find it useful to compare detailed method guides when deciding between high-fidelity lost-wax processes and larger-scale sand-cast solutions. See: bronze casting techniques and the specialist overview of Lost-Wax bronze casting for deeper method-specific notes.
When specifying work, include model scale, target tolerances, preferred finish and any load-bearing or assembly requirements. Clear briefs reduce iteration and help a specialist foundry deliver predictable outcomes.
FAQ
Summary and what to do next
Understanding the main stages in bronze casting helps you set realistic expectations and brief a foundry accurately. Begin by clarifying detail level, tolerances and finish, then discuss method options with the workshop. For a full technical comparison of methods and method-specific recommendations, see the complete guide at complete guide.
If you need a workshop partner experienced in both traditional and modern workflows, include model files and a short brief when you enquire so the foundry can advise on best method and provide a practical timeline.